Tech Tips – K58 Seal Replacement
Tuff Torq K58 seal replacement
This information is provided from Tuff Torq Corporation’s service department to help you understand and successfully replace either the axle seals or input shaft seal on a K58 integrated hydrostatic transaxle. This procedure will be very similar for seal replacements in other Integrated Hydrostatic Transaxle (IHT) products. However, it is always a good idea to contact our service team and discuss your specific repair prior to ordering parts and attempting the repair. Our team is always ready to help with your service needs at (866) 572-3441 or online at www.tufftorqservices.com.
Axle Seal Replacement Procedure
Input Shaft Seal Replacement Procedure
Before beginning the repair
As mentioned above, you should contact our service team prior to beginning a seal repair to discuss your specific issue and to insure you order/purchase the correct parts for the job the first time. Before contacting the service team, you will need to collect the model number of the tractor you will be servicing, as well as the model and serial number on the Tuff Torq unit. The unit model and serial number can be found on the serial number decal on the back of the unit. To locate the decal on your particular unit, use this guide.
With this information, the service technician will be able to help you with specific servicing notes and help you get the correct parts for your project.
We have provided a short video to show you how to remove and replace an axle seal in the K58 IHT.
Below is a general summary of the tools and steps for an axle seal replacement.
Tools needed
- Tuff Torq repair stand (PN 1111)
- Snap ring pliers or seal removal tool
- Electrical (vinyl) tape
- Grease
- Tuff Torq 1″ axle seal installation tool (PN 4444)
- Tuff Torq replacement 1″ axle seal (consult Tuff Torq service team or your local dealer to verify the correct seal for your unit)
Steps to replacing the axle seal in your unit
- Remove unit from vehicle
- Next, remove wheel and hub from axle
- Place unit in Tuff Torq repair stand
- Remove old axle seal
- take care not to scar seal surface while removing old seal
- Inspect old seal
- insure the inner seal tension spring is removed with old seal
- Inspect housing
- make sure there are not chips, cuts or abnormal wearing on the sealing surfaces
- After inspection, clean sealing surfaces with a lint-free cloth or towel.
- Verify that the sealing surfaces are clean and free of debris before installing new seal
- Tape the end of the axle with the electrical tape
- Working from the inside out, tape the end of the axle to protect the new seal from cutting or disfiguring from the machined steel axle ends.
- Grease the inner seal and the axle end
- Apply a light coat of general grease to the inner seal area and the axle end. DO NOT APPLY GREASE TO THE OUTER SEAL AREA. THIS COULD CAUSE PREMATURE FAILURE OF THE NEW SEAL
- After greasing, install and hand seat the new seal in place
- Do not use excessive force to seat new seal. The new seal should be even and level with the housing when properly installed
- Remove tape from the axle
- Next, use installation tool to fully install new seal
- The installation tool has a narrow end and a wide end. Install the narrow end toward the seal and slide along the axle, impacting the seal like a slide hammer. The installation tool will contact the housing when the seal is fully, and correctly, installed
- Check for proper seal seating
- The seal will be below the machined bevel of the housing inside the axle seal seating area when the seal has properly seated in the housing. If the seal is at an angle or has not completely seated below the bevel, it must be removed and replaced with a new seal after checking for obstructions or issues
- Finally, reinstall hub and wheel on axle and reinstall transaxle in vehicle using manufacturer’s guide
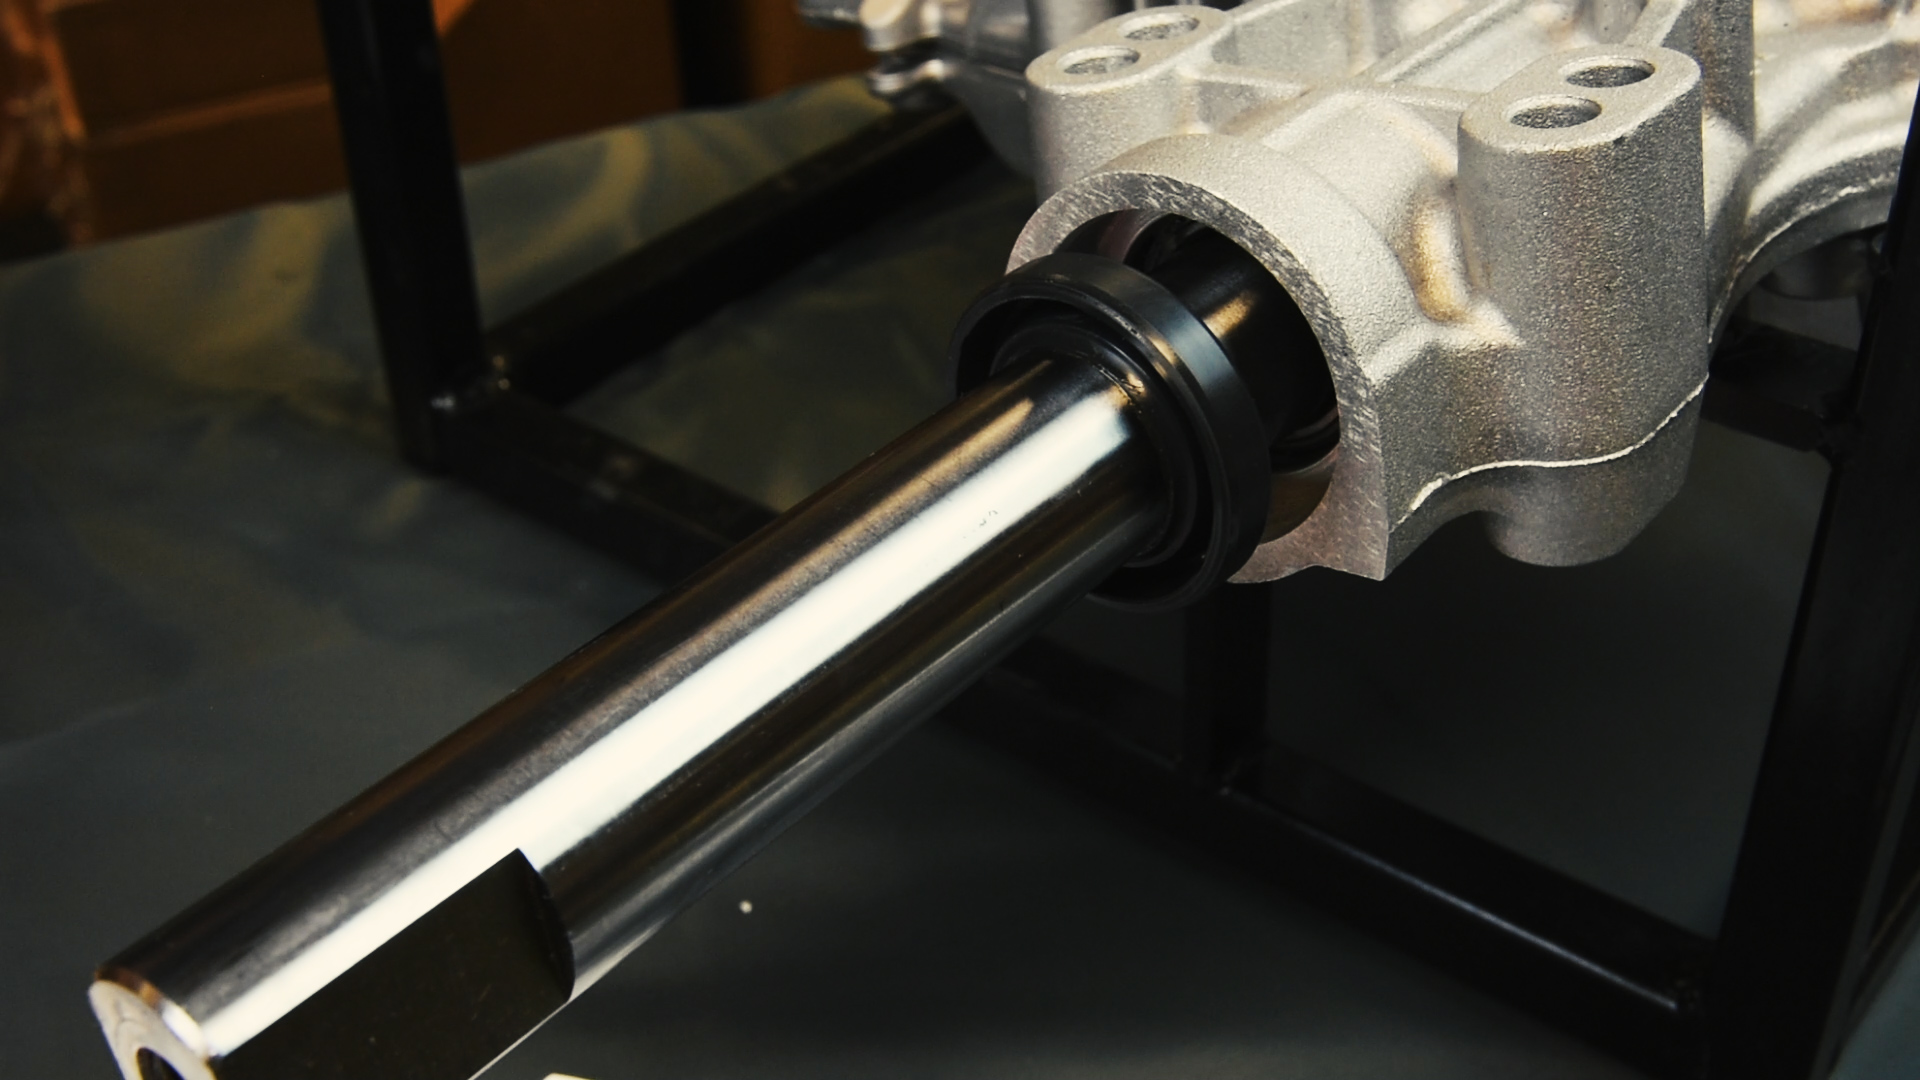
K58 seal replacement – input shaft
The following is a short video we have produced to show you how to remove and replace an input shaft seal in the K58 IHT.
Below is a general summary of the tools and steps for an axle seal replacement.
Tools needed
- Tuff Torq repair stand (PN 1111)
- Rubber Mallet
- Flat head screwdriver
- Electrical (vinyl) tape
- Grease
- Tuff Torq input shaft seal installation tool (PN 2222)
- Tuff Torq replacement input shaft seal (consult Tuff Torq service team or your local dealer to verify the correct seal for your unit)
Steps to replacing the input shaft seal in your unit
- Remove unit from the vehicle following the manufacturer’s guide
- Place unit in Tuff Torq repair stand
- Remove fan and pulley from input shaft following the manufacturer’s guide
- Remove old input shaft seal
- take care not to scar seal surface while removing old seal
- do not use excessive force when inserting the flathead screwdriver to remove seal. Over penetration can damage the input shaft bearing below the seal
- Inspect old seal
- insure the inner seal tension spring is removed with old seal
- Inspect housing
- make sure there are not chips, cuts or abnormal wearing on the sealing surfaces
- After inspection, clean sealing surfaces with a lint-free cloth or towel.
- Verify that the sealing surfaces are clean and free of debris before installing new seal
- Tape the end of the input shaft with the electrical tape
- Working from the bottom up, tape the input shaft to protect the new seal from cutting or disfiguring from the input shaft.
- Be sure to cover the lip of the input shaft inner seal area with tape (approx. 1/16th of an inch)
- Grease the inner seal and the input shaft
- Apply a light coat of general grease to the inner seal area and the input shaft. DO NOT APPLY GREASE TO THE OUTER SEAL AREA. THIS COULD CAUSE PREMATURE FAILURE OF THE NEW SEAL
- After greasing, install and hand seat the new seal in place
- Do not use excessive force to seat new seal. The new seal should be level and even with the housing when properly installed
- Remove tape from input shaft
- Next, use installation tool to fully install new seal
- The installation tool has a raised area on one side of the tool. Install the raised end toward the seal and slide along the input shaft, impacting the seal like a slide hammer. The installation tool will contact the housing when the seal is fully, and correctly, installed
- Check for proper seal seating
- The seal will be below the machined bevel of the housing inside the input shaft seal seating area when the seal has properly seated in the housing. If the seal is at an angle or has not completely seated below the bevel, it must be removed and replaced with a new seal after checking for obstructions or issues
- Finally, reinstall fan and pulley on input shaft and reinstall transaxle in vehicle using manufacturer’s guide
We hope this guide has been helpful. As always, if you have any questions or need any other information, please contact the Tuff Torq service team at (866) 572-3441 or through our contact form. You can also visit our service site at www.tufftorqservices.com for more information and resources.
Share This Article
could you please tell of procedure for fill of compartments on 7A632084830 s/n; 62af0002720
mtd pn : 618 -07281 I have expansion tank. Also was my ax filled at factory with syn or conventional oil Thank You Tom
-
ggraham says:
Hello,
To be brief, an email was sent to your email address. It has the information you seek.
I’ve noticed oil has leaked out of the left side of axle.Would it be the axle seal as shown ?
Leave a Reply